
Qingdao fukelai group technology testing center mainly focuses on the research and development of footwear industry. We have a team of employees who are enterprising, respect science, know technology and management, good at market development, honest and trustworthy, take customer requirements as their own responsibility, and fully develop the team spirit. The number of employees is up to. Since its establishment, fukelai shoes R & D center has been constantly studying and striving to be stable. It has collected, sorted, counted, analyzed and comprehensively compared a large number of indicators on the advantages and disadvantages of various production and processing methods to optimize service.
At the same time, we have advanced product equipment and perfect testing instruments. A set of scientific quality assurance system has been formed from raw materials entering the factory to products leaving the factory. At the same time, we keep up with the development trend of the world footwear industry, and constantly develop new products to provide our high-quality customers, in order to seek mutual win-win. Choose us is to choose a major!
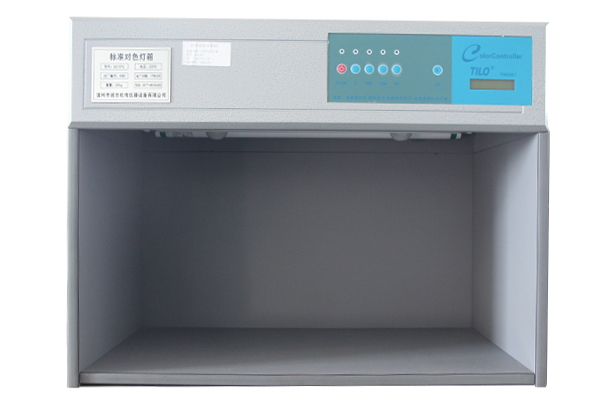
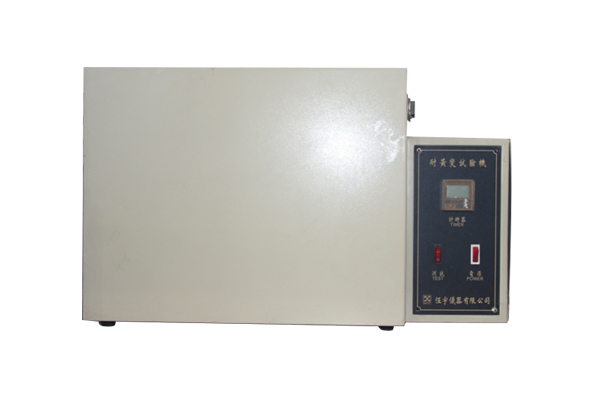
检测设备
操作规程
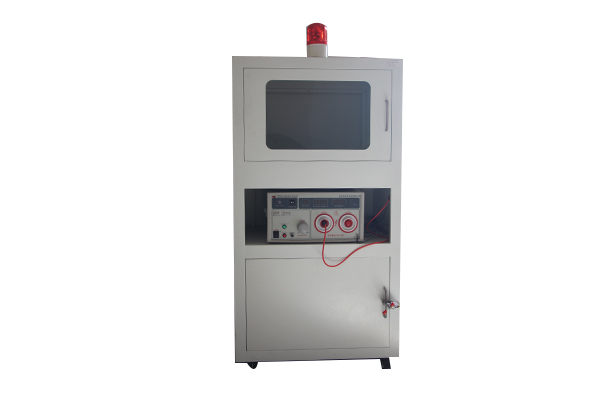
Safety matters
1. The instrument ground terminal must be reliably connected with the power supply ground.
2. Operators must wear insulating gloves and have insulating pads under their feet.
3. Before turning on the power of the instrument, turn the "voltage regulation" knob anticlockwise to the end.
4. Do not contact the tested parts and test wires in the test state.
5. Do not manually open the high-voltage output end to the enclosure or ground wire to avoid damaging the instrument.
6. In case of accident, cut off the power supply immediately.
Operation specification
1. Pour 5mm diameter steel ball into the test shoe, completely cover the insole, to be tested.
2. Confirm whether the power supply meets the requirements, and check whether the "voltage regulation" knob of the instrument rotates counterclockwise to the end.
3. Open the glass door, put the test shoes on the iron plate in the test box, and put the shoes directly on the bottom of the shoes to contact with the iron plate.
4. Put the test black electrode lead into the shoe and clamp it on the chain, and clamp the red electrode on the iron plate.
5. Close the glass door, make sure that the "voltage regulation" knob is set to "0", and then turn on the power switch.
6, the use of "timing test" or "manual test" first choose to set up and then press the "start" switch, and then adjust the "voltage adjustment" knob to make the output voltage to the desired value.
7. During the test, if the "leakage current" is detected to exceed the set value, the instrument will automatically alarm and cut off the output voltage, then press the "reset" switch.
8. If the detected "leakage current does not exceed the set value, the instrument will return to the test state after the timing time is up or the" reset "switch is pressed.
9. At the end of each test, the "voltage regulation" button must return to the "0" position after the end of the chamber.
10. After the test, make records and turn off the power supply.


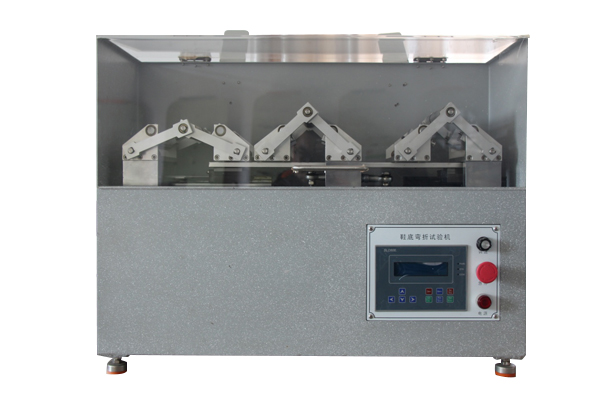
Preparations
1. Take the sample. The sample size shall be the same or smaller than the standard folding last size.
2. Check whether the appearance quality of the big bottom and the surrounding strip of the sample meets the standard.
Operation method
1. Plug in the power, turn on the power switch, and enter the test interface after the welcome interface appears.
2. Press the "set" key to enter the test number setting state mode. Enter the number of tests by each key mark.
3. After setting the test times, press the "set" key again to start the operation.
4. Shake the flexure bracket by hand, adjust the angle of the test fixture, and then install the sample.
5. Adjust all parts of the testing machine to be normal, and then place the standard folding last in the sample shoe.
Preparation
1. Take the sample. The sample size shall be the same or smaller than the standard folding last size.
2. Check whether the appearance quality of the big bottom and the surrounding strip of the sample meets the standard.
Operation method < br / >
1. Plug in the power, turn on the power switch, and enter the test interface after the welcome interface appears.
2. Press the "set" key to enter the test number setting state mode. Enter the number of tests by each key mark.
3. After setting the test times, press the "set" key again to start the operation.
4. Shake the flexure bracket by hand, adjust the angle of the test fixture, and then install the sample.
5. Adjust all parts of the testing machine to be normal, and then place the standard folding last in the sample shoe.
6. turn the shoe into the front, and place it on the front palm of the tester. Then adjust the best position in the clamping plate to compress the front part of the shoe. Then turn the angle adjusting screw of the forefoot to adjust the angle of the forefoot plate, so that the heel of the shoe can naturally rest on the heel sliding block, and finally tighten the top bolt column to firmly compress the forefoot part of the shoe sample.
7. Use the fastening rope to bypass the V-shaped buckle and rope pin post of the last, and bind the heel of the shoe sample to the heel sliding block.
8. Loosen the joint head bolt, adjust the deflection angle required by the standard through the angle adjusting bolt of the heel. After the adjustment, it is necessary to tighten the joint head bolt. The angle of the test deflection can be observed in the angle pointer disk.
9. For the test requiring a large sole cut, use a cutting knife to cut the sample sole according to the requirements of the standard, and then move the air outlet to align with the cut.
10. Press the "start / close" key, and slowly accelerate to the specified bending frequency through the speed regulating knob. The standard specified frequency is 230 times / min.
11. When it starts to run to about 500 times, press the "close" key, pause the test, check whether the sample is fixed firmly, and then continue the start-up test after confirmation. After running to the set number of flexure times, the tester will automatically stop running.
12. After the test, the sample can be taken out for inspection and record.
13. Turn off the power and clean the testing machine.
Executive standard of this testing machine < br / >
1. Hg / t2871-2008 test method for flexure of rubber overshoes (method a).
2. GB / 3903.1-2008 general test methods for footwear - folding test method.

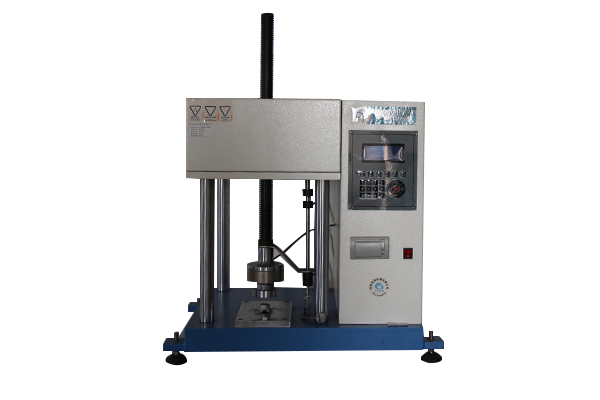
1. Start and connect the power supply, turn on the computer and display, make the computer enter the windows operating system, click the windows software icon to enter the application interface, and the computer starts up.
2. Test piece clamping operation: according to the specific direction of rotation of the clamp, first clamp the upper end of the sample with the upper chuck. Select the moving speed of the crossbeam as 50mm / min in the computer, press the "up" or "down" button of the remote control box, and adjust the position of the middle crossbeam so that the lower chuck is just suitable for the lower end of the clamping specimen. Adjust the zero point of the test force to clamp the lower chuck. As soon as the sample is clamped, the computer will show that there is a small initial load. If necessary, you can further adjust the position of the middle crossbeam through the "up" or "down" button of the remote control box or the computer mouse at a low speed, so that the force value on the computer is displayed as zero. If only a rough test is carried out, it is not necessary to adjust the zero point and carry out the test directly.
3. Test deformation: if it is necessary to test the deformation of the sample, install the extensometer on the sample through the rubber strip, remove the adjusting gasket, and adjust the zero point of the sample deformation display.
4. Select appropriate automatic control test procedure or manual operation to control the rise of beam.
5. If the extensometer is used for the test, the extensometer shall be removed before the specimen breaks, or the conditions for measuring the specimen deformation with the extensometer shall be set according to the software user manual, and the extensometer shall be removed quickly according to the prompts of the test software to prevent the extensometer from being damaged.
6. After the test, the testing machine will stop automatically, and the user shall enter the data analysis interface to process the test data.
7. Rotate the handle, loosen and remove the sample according to the specific rotation direction prompt of the clamp.
8. Print or save the processing results and complete the test.
9. Cut off the power supply after all tests are completed. Cut off the power supply in the following order: turn the power switch of the testing machine to off state, exit the computer application software, turn off the computer, cut off the computer, cut off the main power supply.
10. Precautions: 1) before starting the testing machine, it is necessary to check the limit switch position of the upper and lower clamps to make them meet the requirements of the test stroke and ensure that the upper and lower clamps are at least 10cm apart.
2) When placing the sample, be sure to put the sample in more than 2 / 3 of the jaw.
3) During the test, in case of emergency, please turn off the stop button immediately to protect the equipment.
11. Working conditions: temperature 10-35 ℃
Preparation of test pieces: according to the provisions of the standard, take 3 test pieces as specified, take the maximum area of the sole, draw a straight line, and then use a wedge needle to pierce three holes to measure the hole diameter.
Operation
1、启动1. Start the power switch, first press the "Zeo" reset key to reset, then press the "SART" start key, run the test machine idly first, if there is no problem in operation, the machine will be shut down for operation.
2. Put the clamp in a flat state, and then place the test piece in the machine clamp and fix it.
3. Set the test times as required, and then press the save key to save the data.
4. Press the "start" key, turn the "speed control knob" to enter the test.
5. Press the stop key to end the test.
6. Turn off the power and take out the test piece.
This test is in accordance with GB / 209912007 test methods for personal protective equipment shoes.
Qingdao fukelai Group Co., Ltd Customer service hotline :0532-4006532097
Copyright© 2019 青岛福客来集团 版权所有 Record:鲁ICP备05027830